How to Manage Cities in Enroute
The Cities module in Enroute allows administrators to define and manage cities under predefined regions. This supports organized zone-level delivery operations and area-based categorization.
Accessing the Cities Module
- Log into the Enroute admin panel.
- From the left sidebar menu, go to Setup > Service Areas & Partners.
- Click on Cities under this section.

Add a New City
To create a new city:
- In the “Add City” section at the top:
- Enter the City Name in the input field.
- Select the appropriate Region from the dropdown.
- Click the “Save” button to add the city to the system. The new city will now appear in the City List below.

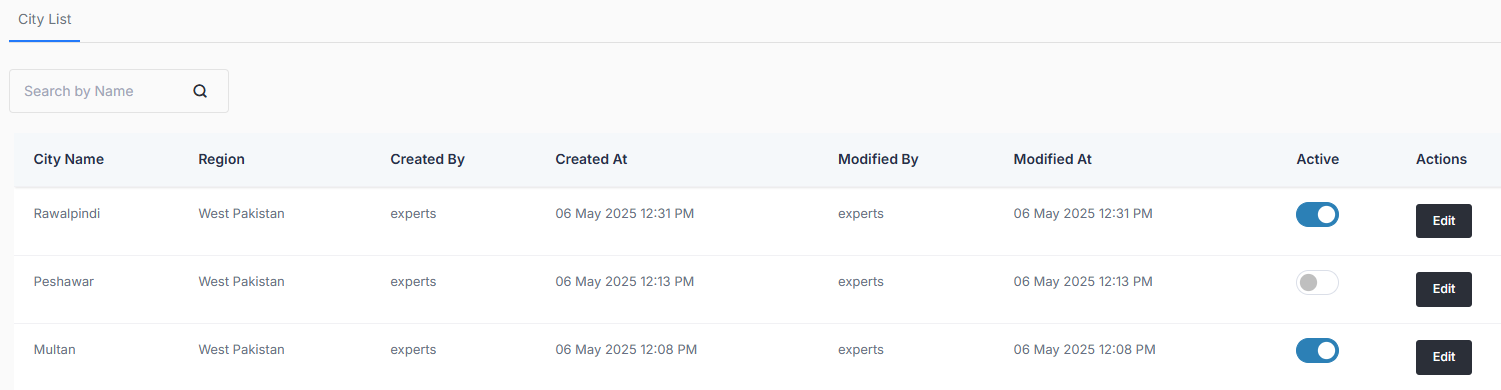
City List Overview
The City List displays all configured cities in a table format. Each row includes the following details:
- City Name – The name of the city.
- Region – The associated region for the city.
- Created By – The user who initially created the entry.
- Created At – Timestamp of creation.
- Modified By – User who last updated the entry.
- Modified At – Last modified timestamp.
- Active – Toggle to enable or disable the city.
- Actions – Edit button for modifying city details.
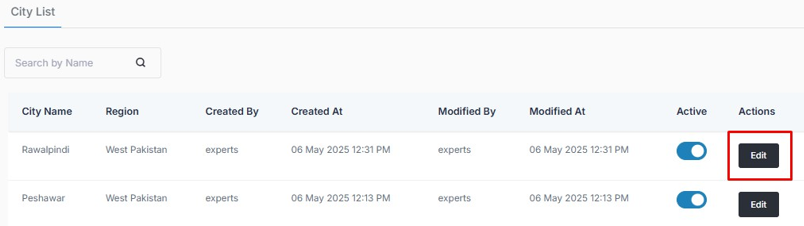
Edit a City
To update an existing city:
- Click the “Edit” button in the Actions column.
- Modify the city name or associated region as needed.
- Click “Save” to apply your changes.
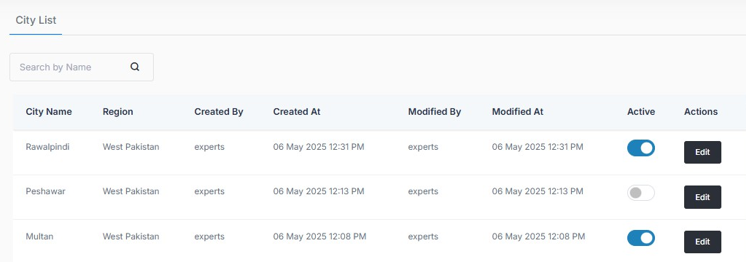
Activate or Deactivate a City
- Use the toggle switch under the Active column to turn the city on or off.
- A blue toggle means the city is active; gray means inactive.
Deactivated cities will not be available for new orders or operational assignments.
Search Cities
- Use the Search bar to filter cities by name for quicker access and edits.

note
- Ensure each city is linked to the correct Region to maintain delivery structure integrity.
- Duplicate city names under the same region may not be allowed.
- Activating/deactivating a city affects its availability across zones, stores, and other dependent modules.