How to Manage Zones in Enroute
A Zone in Enroute defines a specific delivery or service area within a city. Each zone is associated with:
- A Region
- A City
- Geographical coordinates (mapped zone path)
- Performance data (salesmen, riders, hubs, etc.)
Accessing the Zones Section
To access Zones:
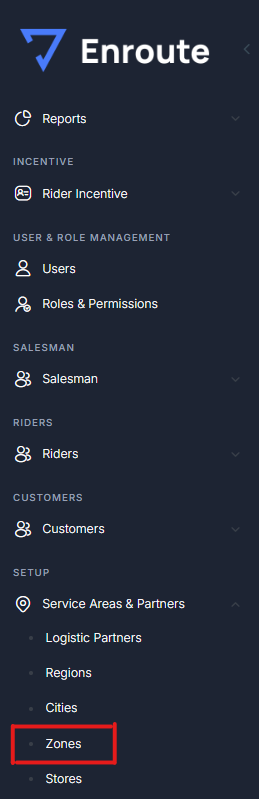
- Log in as Administrator.
- In the left-hand menu, go to Setup > Service Areas & Partners > Zones.
You’ll see two tabs:
- Zone List: Displays existing zones.
- Add Zone: For adding new zones.
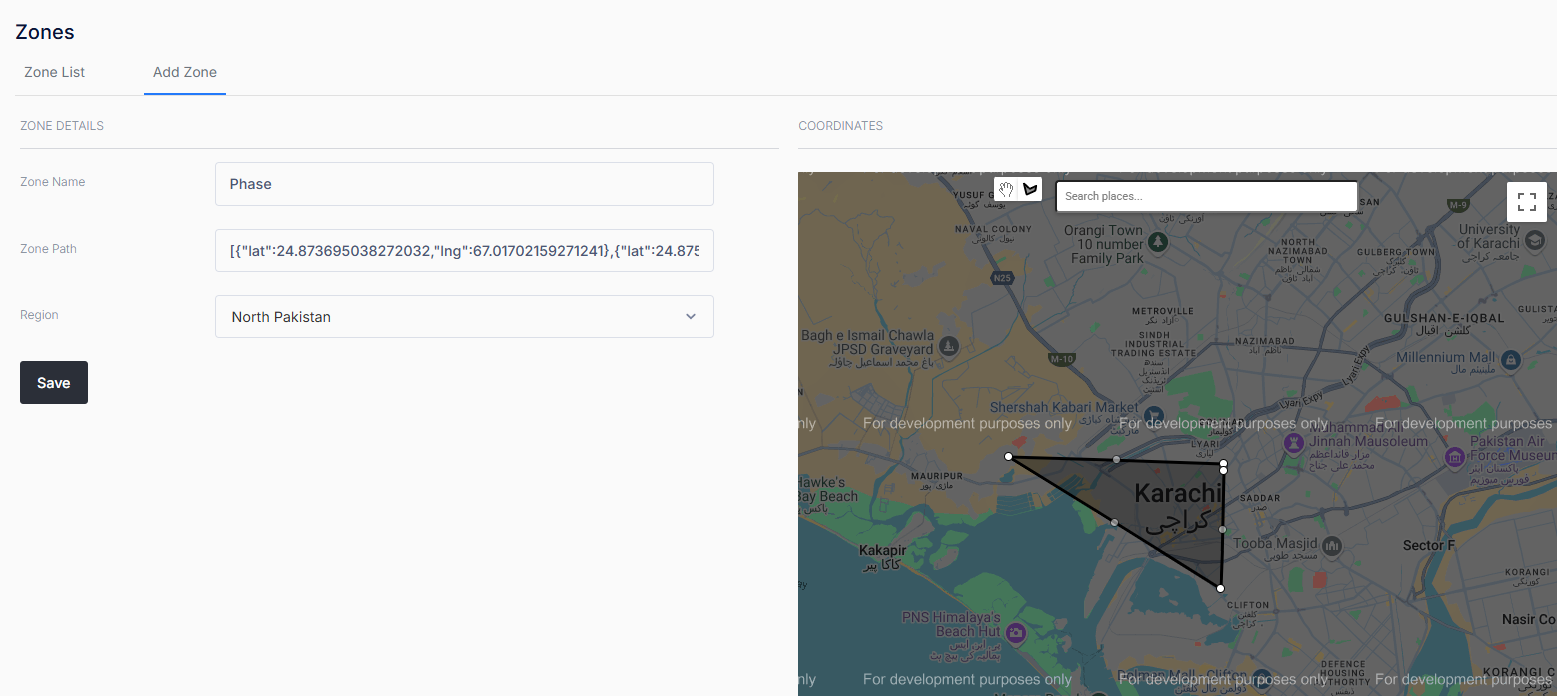
How to Add a New Zone
-
Navigate to the Add Zone tab.
-
Fill in the Zone Details:
- Zone Name: Enter a unique name (e.g., "DHA", "Korangi").
- Zone Path: Automatically generated from coordinates (you’ll select this on the map).
- Region: Select the relevant region from the dropdown.
- City: Select the city under the selected region.
-
On the map:
- Use the drawing tool to mark your zone boundaries.
- Coordinates will auto-populate in the Zone Path.
-
Click Save to add the zone.
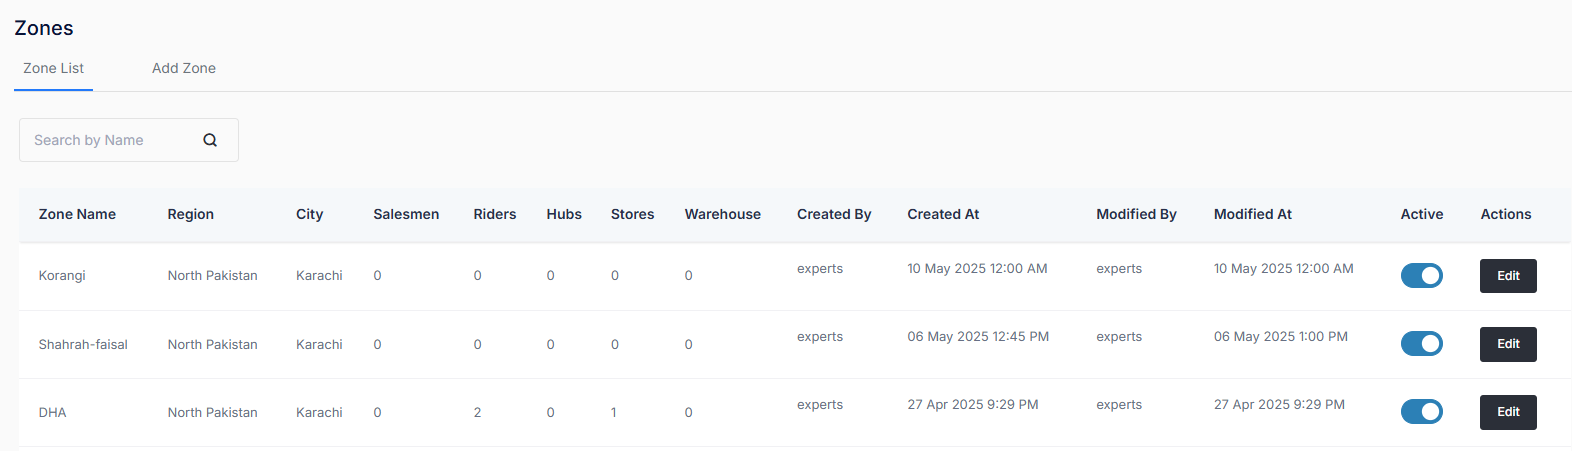
How to View or Manage Existing Zones
-
Go to the Zone List tab.
-
Use the Search by Name bar to quickly find zones.
-
Each listed zone displays:
- Zone Name, Region, and City
- Count of Salesmen, Riders, Hubs, Stores, and Warehouse
- Created By/At and Modified By/At
- Toggle to activate/deactivate the zone
- Edit button to modify details or coordinates
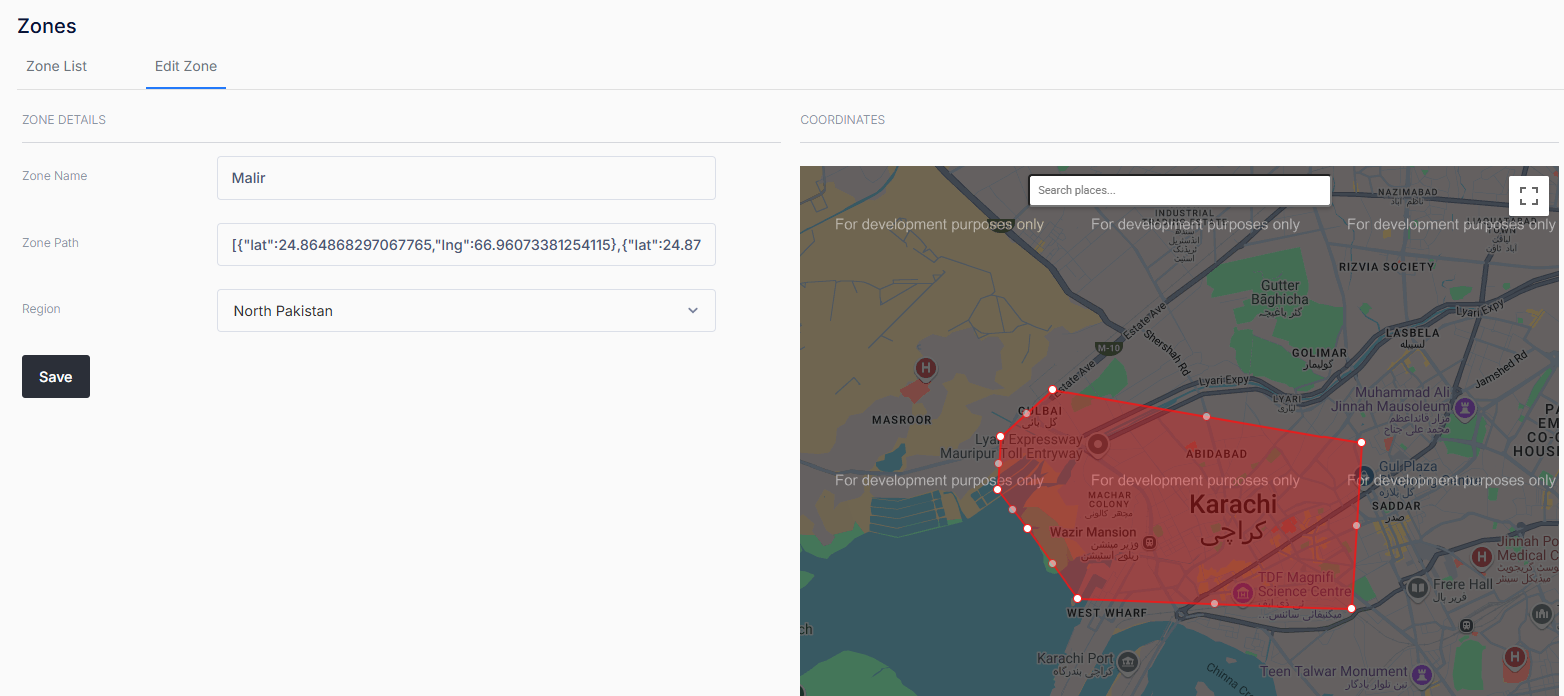
How to Edit a Zone
- In the Zone List, click Edit on the desired zone.
- Update any fields or redraw the zone boundary on the map.
- Save your changes.